Thanks for stopping by!
Monday, October 11, 2010
Sunday, October 10, 2010
A special gift for a special friend
My girlfriend Donna who lives in Moncton New Brunswick is in Ontario this week with her husband Gil. Hubby and I are meeting them at their hotel and will be taking them out for dinner tonight. Donna and I met in 1967 at Nursing School here in Toronto. She was living in Oshawa ON at the time with her parents and brother. While at school; we both lived at a girls residence that was run by the Anglican Church. We became very good friends and when she & Gil got married in Nov. 1970, I was her bridesmaid. Shortly after they got married they moved to Newfoundland and then to Moncton New Brunswick where they have lived ever since. Moncton is about 1,000 miles from Toronto where I live so needless to say; we don't see each other very often. We have always kept in touch and have visited each other maybe 5 times over the last 40 years. She had a birthday in September and I did not send her a card (I know, shame on me!). I had enough time today to make her a mini pizza box with a bracelet that I made for her with her birthstone with sapphire swarovski crystals. I liked her bracelet so much that I also made one for myself!
Here is the card I am giving her:
Here is the bracelet I made for her:
Here is the mini pizza box with a belly band to hold it closed. I found the tutorial at Splitcoast Stampers. The stamp I used is from Just Rite stamps. I also cut the scallop circle using a nestibility in my cuttlebug. I cut the image using a circle punch. I should have stamped it before cutting it as it is not quite centred but I'm sure Donna won't mind.
Here is a shot of the bracelet inside a purple organza bag with glittery butterflies:
I enjoyed making this for my good friend and hope she likes it as much as I do.
Gotta run, need to shower and get dressed for my dinner date!
Oma
Here is the card I am giving her:
Here is the bracelet I made for her:
Here is the mini pizza box with a belly band to hold it closed. I found the tutorial at Splitcoast Stampers. The stamp I used is from Just Rite stamps. I also cut the scallop circle using a nestibility in my cuttlebug. I cut the image using a circle punch. I should have stamped it before cutting it as it is not quite centred but I'm sure Donna won't mind.
Here is a shot of the bracelet inside a purple organza bag with glittery butterflies:
I enjoyed making this for my good friend and hope she likes it as much as I do.
Gotta run, need to shower and get dressed for my dinner date!
Oma
Sunday, September 26, 2010
Just because..........
I stayed home from work on Thurs. & Fri. as I was not feeling well at all. I felt like I had been hit by a truck and my throat was very sore and I could barely talk. I went to my Dr. on Thurs. morning & he put me on an antibiotic. Friday I felt better so I made some cards for my 2 adorable granddaughters, Sierra and Brooke. My favourite LSS has card classes but I am unable to make some of them. They put together all the elements required to make the cards in a kit form. I took some of the card kits with me when I was on vacation in Wisconsin at the beginning of the month. I bought another kit last week and chose 2 of the cards to make for my granddaughters.
I hope you like them as much as I do!
First up is Sierra's card:
I don't know which stamp set this is but I really like it. The flowers were stamped on designer paper and all I had to do was cut them out and adhere them over the stamped image. The butterflies I added was my own idea. This card was easy & fun to make. I sponged the card stock and designer paper and used my corner punch to soften the edges.
Today I used my nesties and cuttlebug to add the sentiment inside the card. I hope Sierra will like it.
Last but not least is the card I made for Brooke. The sentiment is from Just Rite stamps and fit perfectly on the white circle which I sponged with olive green ink. The prima flowers are from my stash and was my own idea. I don't know which stamp this is either as it had already been stamped for me. All I did was colour it with my prisma colour pencils.
Here is the inside of Brooke's card:
The girls love to get mail and I love making cards for them. All around a win win situation!
Thanks for stopping by!
I hope you like them as much as I do!
First up is Sierra's card:
Today I used my nesties and cuttlebug to add the sentiment inside the card. I hope Sierra will like it.
On the back of the card at the bottom I added the finishing touch - my watermark if you will.
Last but not least is the card I made for Brooke. The sentiment is from Just Rite stamps and fit perfectly on the white circle which I sponged with olive green ink. The prima flowers are from my stash and was my own idea. I don't know which stamp this is either as it had already been stamped for me. All I did was colour it with my prisma colour pencils.
The girls love to get mail and I love making cards for them. All around a win win situation!
Thanks for stopping by!
Sunday, September 19, 2010
Necklace for Claire
Remember this post?
I finally made a necklace for Claire and put it in the easel card box I made. Here are some photos:
Here is a close up:
Here is the necklace in the easel card box:
Thanks for stopping by!
I finally made a necklace for Claire and put it in the easel card box I made. Here are some photos:
Here is a close up:
Here is the necklace in the easel card box:
Claire really likes it and I am happy that I was able to make something for her that she likes.
Thanks for stopping by!
I'm in deep Doodoo!
I bought my 5 yr. granddaughter Sierra a Friendship Bracelet kit. I don't think my Daughter appreciated it very much cuz now she has made up a new house rule:
You can read about it here on her blog.
I have a feeling I will be spending time with Sierra on Christmas Day when I give her the scrapbook album kit I got for her and I also got one for 3 yr. Brooke. You can see the album kits I bought for them here. The sales lady in the store said she got one for her 7 yr. old niece and it took them 2 hours to make up the album. I showed it to my daughter and she loved it. She scrapbooks and has made a lot of pages. She will be on maternity leave for a year beginning in late October and is looking forward to spending time with the girls and the new baby who will be joining them soon.
I got the albums at this store which is in St. Jacob's. Opa and I went there yesterday. We got some fresh veggies, homemade bread, home made baked goods (date squares and nanaimo bars) and I also bought myself 2 pullover sweaters and 2 pair of corduroy pants at the outlet mall.
Thanks for stopping by!
You can read about it here on her blog.
I have a feeling I will be spending time with Sierra on Christmas Day when I give her the scrapbook album kit I got for her and I also got one for 3 yr. Brooke. You can see the album kits I bought for them here. The sales lady in the store said she got one for her 7 yr. old niece and it took them 2 hours to make up the album. I showed it to my daughter and she loved it. She scrapbooks and has made a lot of pages. She will be on maternity leave for a year beginning in late October and is looking forward to spending time with the girls and the new baby who will be joining them soon.
I got the albums at this store which is in St. Jacob's. Opa and I went there yesterday. We got some fresh veggies, homemade bread, home made baked goods (date squares and nanaimo bars) and I also bought myself 2 pullover sweaters and 2 pair of corduroy pants at the outlet mall.
Thanks for stopping by!
Friday, August 27, 2010
Stamp class with Nicky
On Wednesday evening I went to another one of Nicky's stamp classes at Pointer's Scrapbooking Store which just happens to be up the road a way from where I work.
We made 5 gorgeous cards and I had a blast making them. Nicky is very patient and also very encouraging. Here are the cards we made:
This was the 1st card we made. We put some drops of ink on glossy photo paper and then used canned air to make the ink spread out. After the ink dried, we stamped a flower image in black onto the glossy paper. This was a very interesting technique and I am pleased at how it turned out. I still have some of the glossy paper with the ink and am thinking of stamping a butterfly on it.
Here is the 2nd card we made:


We made 5 gorgeous cards and I had a blast making them. Nicky is very patient and also very encouraging. Here are the cards we made:
This was the 1st card we made. We put some drops of ink on glossy photo paper and then used canned air to make the ink spread out. After the ink dried, we stamped a flower image in black onto the glossy paper. This was a very interesting technique and I am pleased at how it turned out. I still have some of the glossy paper with the ink and am thinking of stamping a butterfly on it.
Here is the 2nd card we made:
I love this card and the technique we used was very interesting. I have some CTMH butterfly stamps that I can't wait to ink up and colour using the technique Nicky showed us. We coloured the butterflies with a Dove blender and Lyra watercolour crayons. I don't have the Dove blender or the crayons but it was so easy to do that I am seriously thinking of getting them. We sponged the background with light blue chalk and a cotton ball. It almost looks like clouds. We also stamped the circles onto the card.
This is the 3rd card we made:
This is my favourite card. It looks so much nicer in real life. I love the image and the paper and Simon's background stamp. Simon and his wife own Pointer's Scrapbooking store. There is lots of glitter on the stamped image.
This is the 4th card we made:
This card was fairly easy to make. We stamped flowers with blue ink and then glittered them up. I love the scallop punch on this card. This card might be going to my 3 yr. old granddaughter as her favourite colour is blue.
Last but not least is this card:
This card was easy peasy and we used pink chalk and a cotton ball to sponge the background. We added some pink rhinestones to the small punched flowers.
I am terrible at tying ribbon so Nicky tied all the ribbons for me. I am looking forward to attending Nicky's next class in Sep. at Pointer's.
Sunday, August 8, 2010
Birthday easel card box
I made this for my SIL Claire; who is married to my brother Peter. Peter has Parkinson's Disease and also Alzheimer's Disease and is in a nursing home. Claire has been very good to Peter. I made her a bracelet which can be found here in this post.
Her birthday is August 11th and here is the card I made for her:
Another view:
A view of the card closed:
I used the tutorial that Joani posted on her blog here.
It was a lot easier than I thought it would be and I had a lot of fun with this project. The card stock is from my stash. The designer paper is from Stampin Up, the brad is from my stash and the stamped image is a Verve stamp. I stamped the tulips twice and popped it up on the main image. I was very pleased with how this project turned out.
I will be making Claire a necklace to go with the bracelet that I made for her. I'm sure she will be pleased as punch to receive it.
Thanks for stopping by!
Her birthday is August 11th and here is the card I made for her:
Another view:
A view of the card closed:
I used the tutorial that Joani posted on her blog here.
It was a lot easier than I thought it would be and I had a lot of fun with this project. The card stock is from my stash. The designer paper is from Stampin Up, the brad is from my stash and the stamped image is a Verve stamp. I stamped the tulips twice and popped it up on the main image. I was very pleased with how this project turned out.
I will be making Claire a necklace to go with the bracelet that I made for her. I'm sure she will be pleased as punch to receive it.
Thanks for stopping by!
Christmas in July
I made this card last month. I am very pleased with how it turned out. It looks much better in real life:
I love the pinwheel on this card. The designer paper is from CTMH; brad from my stash; the embossed piece is the Petals a Plenty embossing folder from Stampin Up. I embossed it using my cuttlebug (love this gadget!). I used shiny gold card stock for the card and the 2 squares behind the pinwheel and the ribbon is from my rather large stash of ribbon.
Thanks for stopping by!
I love the pinwheel on this card. The designer paper is from CTMH; brad from my stash; the embossed piece is the Petals a Plenty embossing folder from Stampin Up. I embossed it using my cuttlebug (love this gadget!). I used shiny gold card stock for the card and the 2 squares behind the pinwheel and the ribbon is from my rather large stash of ribbon.
Thanks for stopping by!
Sunday, July 25, 2010
Card class with Nicky
On Wednesday after work I went to a card making class at my favourite scrappbooking store which was taught by none other than Nicky Manel. We made 5 cards and I will be mailing one of them to my younger sister Alice, who will be celebrating a birthday on July 27th.
Here are the cards we made:
Hmm, looks like I better get out my paint brush and go over the leaves with some more colour.
I thoroughly enjoyed this class and learned some new techniques painting with markers and mineral spirits.
I still have some cards to put together for a class that my niece Krista had in the spring. I wasn't able to get to the class but got all the elements from Krista to put together the cards and a box to hold them. When I get them done, I will post them here.
Thanks for stopping by!
Here are the cards we made:
This card is so pretty in real life and I love the punch we used on this card.
Love butterflies!
If you look closely there is some glitter on the Bo Bunny paper circles. I also love the bling!
I kinda screwed up when I stamped the swirl on this card but "fixed" it with a glue pen and glitter. There is also some glitter on the birthday tag.
The owner of Pointer Scrapbooking is making rubber stamps and I couldn't resist buying this one:
Hmm, looks like I better get out my paint brush and go over the leaves with some more colour.
I thoroughly enjoyed this class and learned some new techniques painting with markers and mineral spirits.
I still have some cards to put together for a class that my niece Krista had in the spring. I wasn't able to get to the class but got all the elements from Krista to put together the cards and a box to hold them. When I get them done, I will post them here.
Thanks for stopping by!
Sunday, July 11, 2010
Happy Birthday Janice!
Janice turned 29 (again) on Saturday. It seems like yesterday that I was bringing her home from the hospital! She did not want a fuss made but I did make her a card:
I came across this blog post and immediately fell in love with this card:
Diana also did a tutorial for this technique which can be found here.
I used a Just Rite stamp for my card and used my nesties in my cuttlebug to cut and emboss it. I also used a Stampin Up Embossing folder in my cuttlebug for the faux metal tin ceiling technique and cut the squares with a punch. The tulips were coloured with Prismacolour pencils. The card base is red and I thought the black and pink made a nice contrast. I stamped the inside sentiments and then cut and embossed them in my cuttlebug as well. The butterfly was cut with a Martha Stewart punch (love her punches!). I was quite pleased with how this card turned out.
Here are some pics of my beautiful daughter:
The 1st picture was taken last Christmas and the 2nd picture was taken a year ago. She is expecting her 3rd child in November and I'm sure she would kill me if I posted a picture of her baby bump!
Thanks for stopping by!
The inside:
I came across this blog post and immediately fell in love with this card:
Diana also did a tutorial for this technique which can be found here.
I used a Just Rite stamp for my card and used my nesties in my cuttlebug to cut and emboss it. I also used a Stampin Up Embossing folder in my cuttlebug for the faux metal tin ceiling technique and cut the squares with a punch. The tulips were coloured with Prismacolour pencils. The card base is red and I thought the black and pink made a nice contrast. I stamped the inside sentiments and then cut and embossed them in my cuttlebug as well. The butterfly was cut with a Martha Stewart punch (love her punches!). I was quite pleased with how this card turned out.
Here are some pics of my beautiful daughter:
Cheers!
Looking Good!
The 1st picture was taken last Christmas and the 2nd picture was taken a year ago. She is expecting her 3rd child in November and I'm sure she would kill me if I posted a picture of her baby bump!
Thanks for stopping by!
Happy Birthday Brooke!
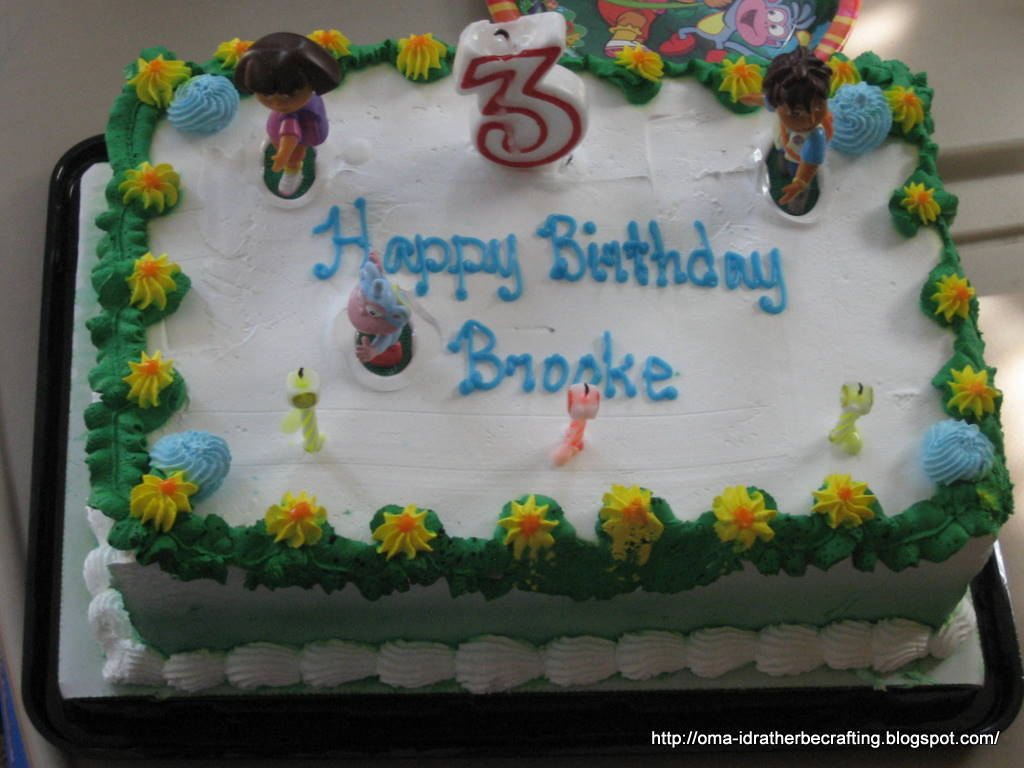
On Wednesday, July 7, my granddaughter Brooke turned 3. We had a party for her yesterday. 2 of her little friends came to celebrate with her. They had a blast playing in the bouncy castle and in the pool. Here are some pics I took:
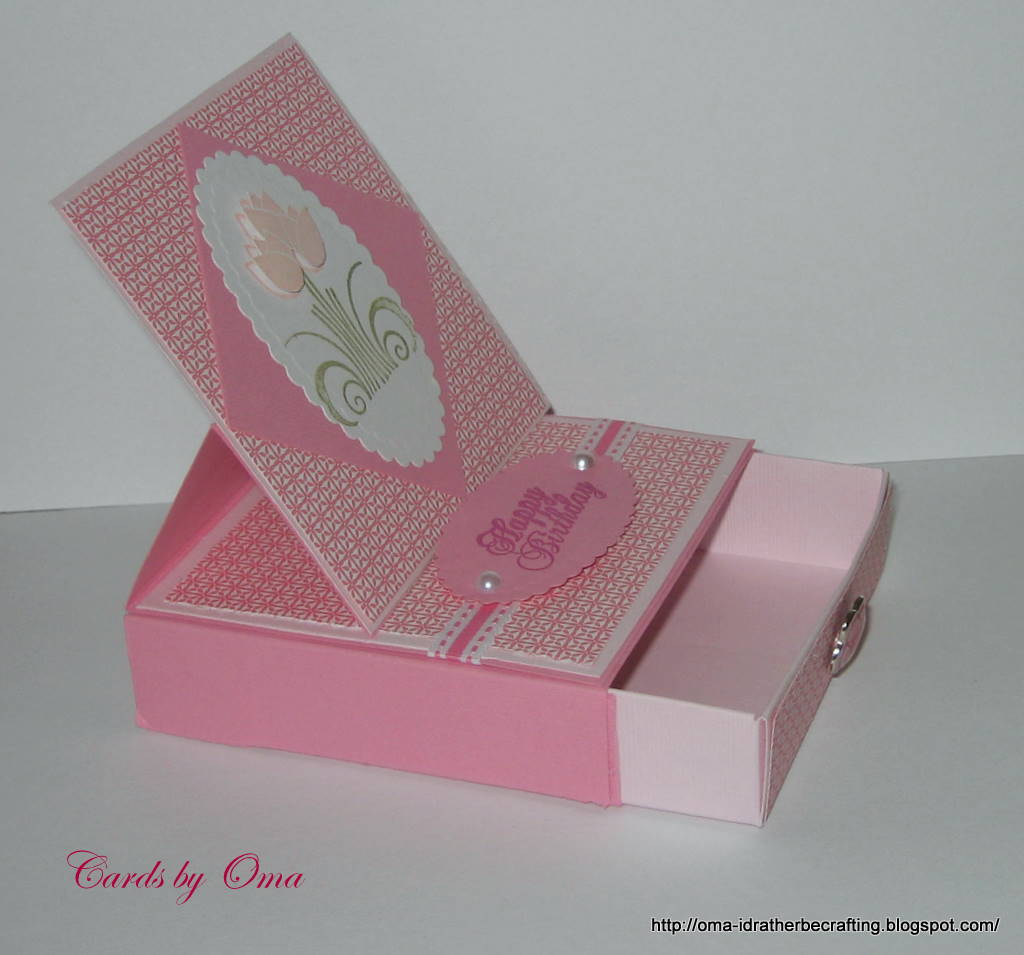
And here is the card I made for her:
The inside:
Thanks for stopping by!
Chocolate Dora Cake
Blowing out the candles with her friends and sister Sierra looking on.
Mmm, chocolate cake and ice cream!
And here is the card I made for her:
The inside:
Thanks for stopping by!
Thursday, July 1, 2010
Happy Canada Day everyone!
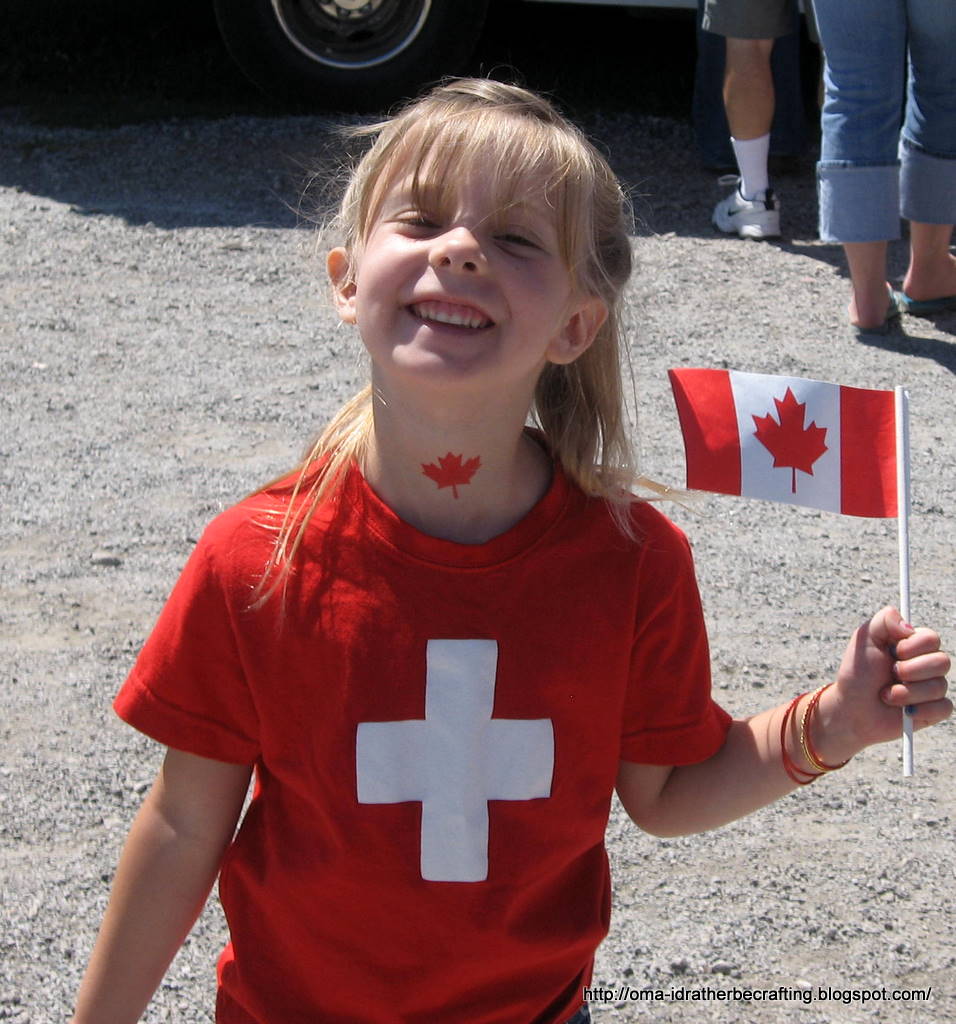
Happy 143rd Birthday Canada!
Subscribe to:
Posts (Atom)